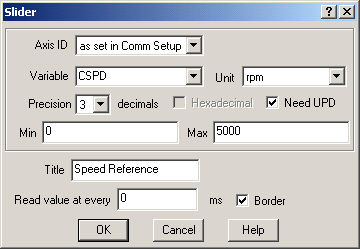
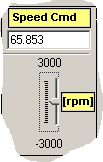
This cursor object is used to change the value of a parameter.


![]() Horizontal cursor: is disposed on horizontal direction.
Horizontal cursor: is disposed on horizontal direction.
![]() Vertical cursor: is disposed on vertical direction.
Vertical cursor: is disposed on vertical direction.
In the Variable field select the desired one from the current list of variables or insert a memory location.
A data memory location must be specified with the following format: type@address where type represents a data type supported by TML: int, long or fixed and address is the memory location address expressed in hexadecimal form. Type is optional if it’s not specified data is interpreted as integer.
Example: fixed@0x0903 the memory contents from addresses 0x0903 and 0x904 are interpreted as a fixed data.
Select Expression to define a formula to be evaluated before being displayed. They can be selected at the moment when the control panel is defined.The Expression can be built using following operators:
“+” - addition
“-“ - subtraction
“*” - multiply
“/” - division
“^” - power
“(“ and “)” - parentheses
The operands used for editing of an expression are:
variable_name [unit]
variable_name
number
Example: 100.5 + 5 * (Position_Command [rot] - 10.0)
In the Axis ID edit field of each object, you can select the Axis ID of the axis from where the variable will be read/set. This will allow you to visualize in one control panel variables from different drives / motors connected into a network. The default Axis ID is “as set in Comm Setup” e.g. the Axis ID selected in the Communicate with field from Communication | Setup dialogue.
Select the measurement unit in “Unit” section, corresponding to the selected variable type.
Adjust the number of decimals by choosing in “Precision” section one of the values from the scroll list, for a convenient representation depending on values range. Note that if the selected measurement unit is “IU” (Internal Units), the decimals parameter is not used. Also for IU representations, hexadecimal format can be selected.
The title of the object window (displayed in the object window title bar) can be specified in Title section. By default, if you don’t specify a title, the variable name will be assumed instead.
For display purposes, display time intervals can be selected in the “Read value at every” field.
See also: