|
Connect the adapter to the network using an UTP cable equipped with RJ45 connectors.
| 1. | Power On the Ethernet adapter |
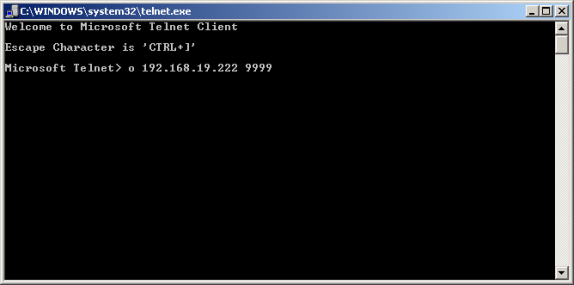
| 2. | From Windows Start menu, select Run and type telnet to launch Microsoft Telnet Client |
| 3. | At its prompt type the following command: |
o x.x.x.x 9999
where x.x.x.x is the IP provided with the Ethernet adapter
9999 is the Ethernet adapter configuration port
| 4. | The following information is displayed |
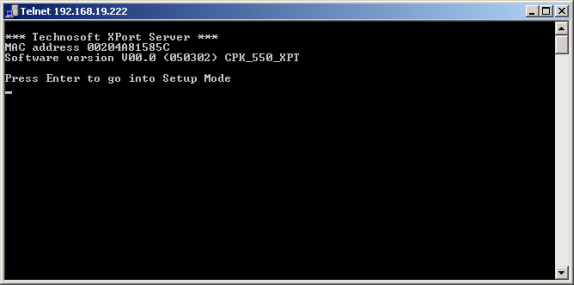
| 5. | To enter in the setup mode, press Enter within 5 seconds. The adapter basic parameters are displayed followed by the menu options |
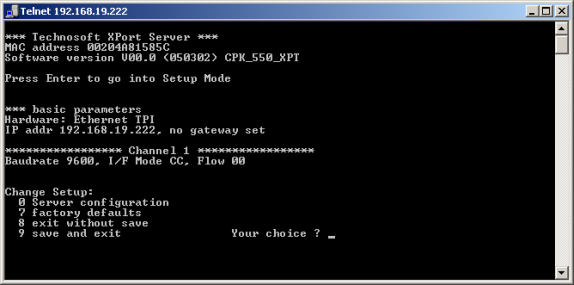
| 6. | Select 0 and press Enter. You will be prompted to insert the following information: |
| • | IP address of the Ethernet adapter. It must be a unique value in your network |
| • | IP address of your gateway |
| • | Netmask – the number of bits for host part from IP address |
| • | A password for Ethernet adapter configuration via Telnet |
Remarks
| • | Contact your network administrator to obtain the values for the adapter IP address, gateway IP address and for the netmask. |
| • | To enable automatic assignment of IP address and network settings by a DHCP server, set the IP address to 0.0.0.0, the gateway to N and netmask 0. In this case you will be prompted to assign also a DHCP name to the adapter. |
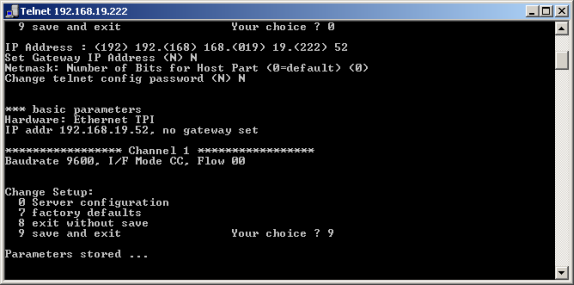
| 7. | Select 9 to save the settings and reboot the Ethernet adapter. |
Ethernet Communication Setup
|